Tuesday, January 27, 2015

Celebrations!

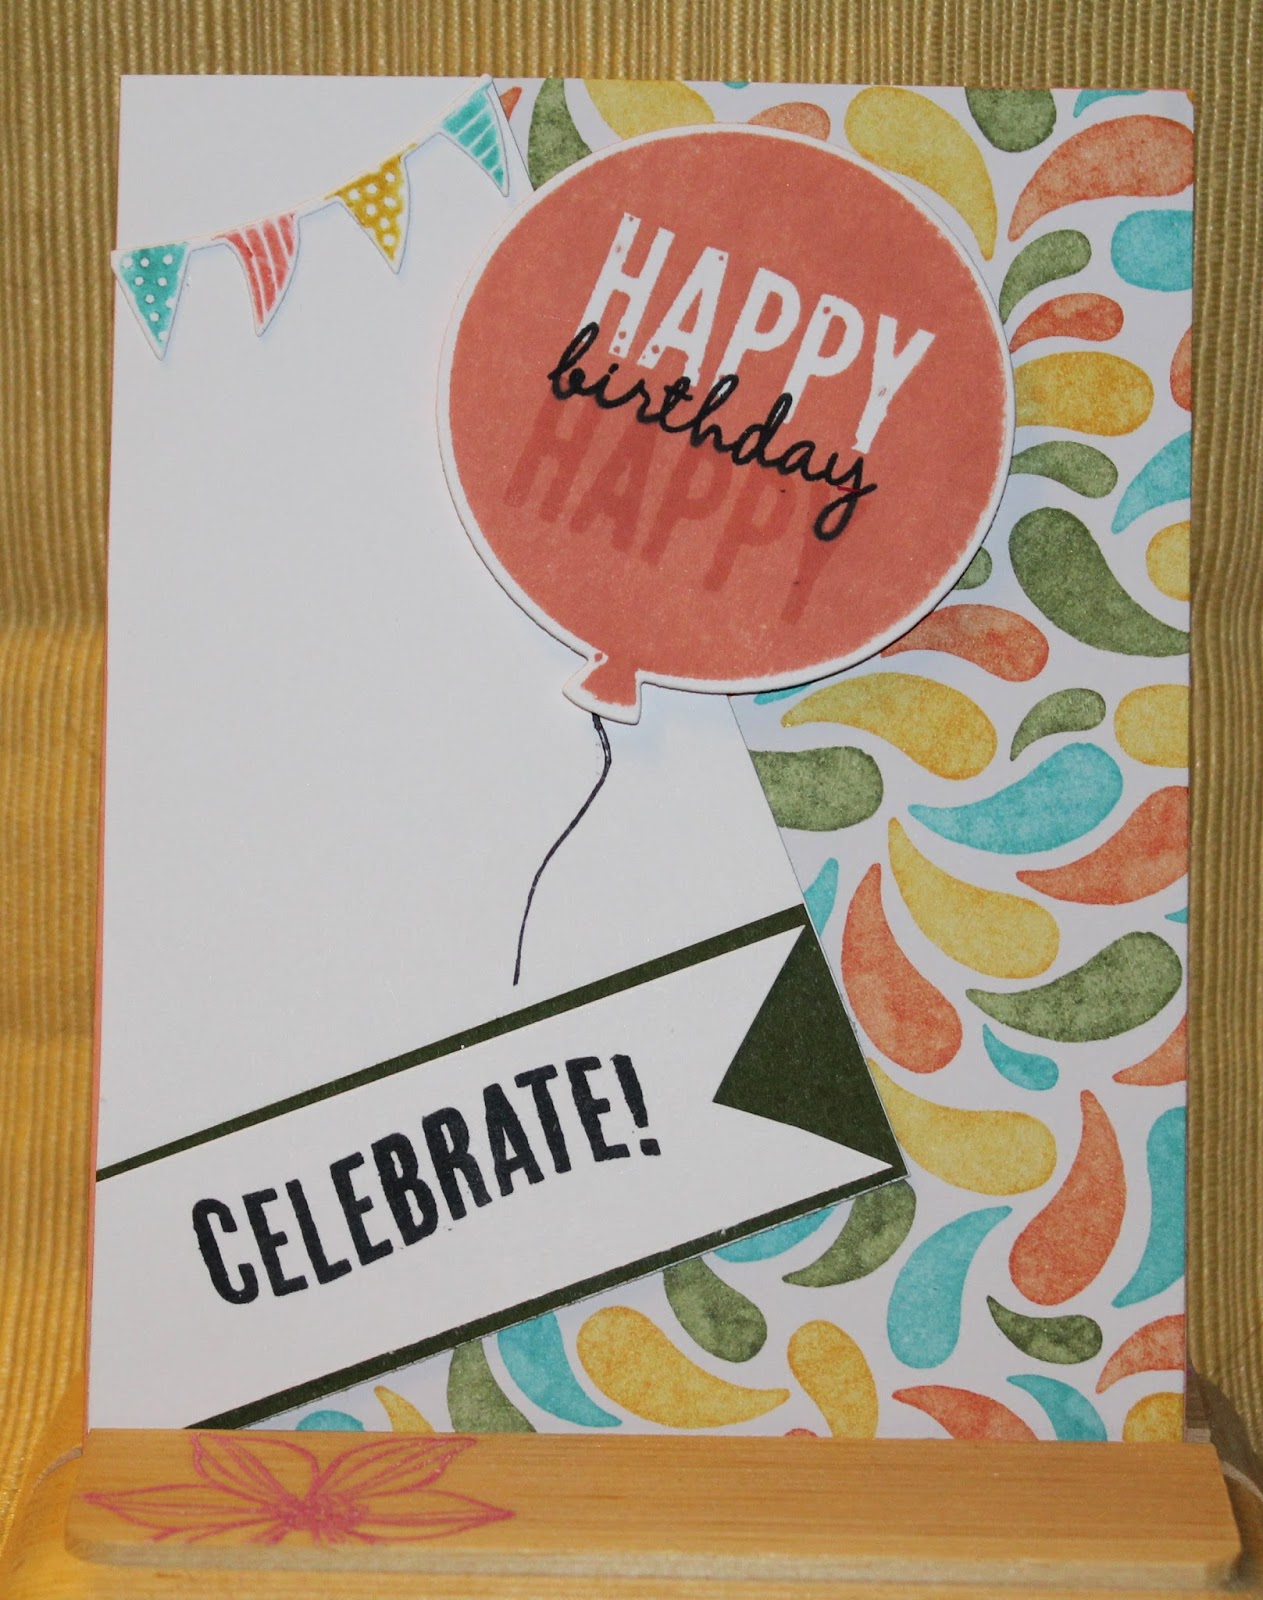
And that was the theme for the cards we created at my first Saturday Stampers group of 2015! As stated in my last post I stopped holding my monthly Mojo Monday groups and went to an every other month group at my house. I wasn't sure how it would work, but I loved it. I felt so comfortable and at ease in my own setting, plus knowing if I forgot something, I just had to run up stairs and retrieve it. The ladies didn't have to worry about rushing to get home after work too. I thinking this may work. 

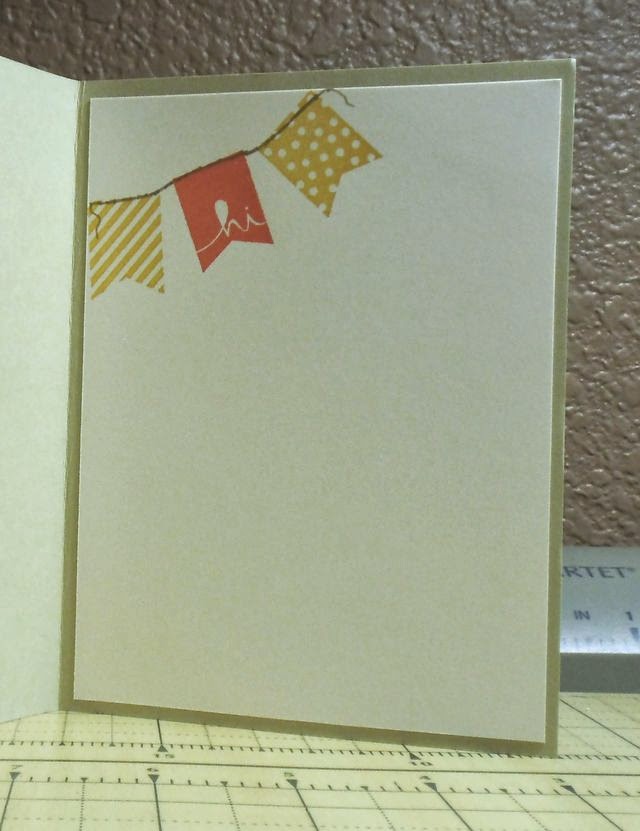
Starting with using the Celebrate Today stamp set, the Birthday Bash DSP, and the Balloon Framelits Dies we created two fun cards for birthdays. The first card was a combination and CASE from a card of Shelly Roberts, thrown in with a card Jen Arkfold had created. The fun of a good CASE card is making it your own. The second cards was inspired by Justin Krieger, I liked how he used the vellum paper for the balloons so you can look through them and see the fun DSP paper. It is hard to see but the Happy Birthday is in gold ink and the DSP also has some balloon in gold. Okay you can see one of the gold balloons in the upper right hand corner. 


The next cards are more Birthday Celebrations. Using the FREE Big Day stamp set; wait did I say free (?), why, yes I did, because it is Sale-a-Bration time (SAB), more on that later…..Using the Big Day set, we created 2 different cards. The first one was done using Memento black ink and then coloring in the letters for some fun, on white for a tag. The top of the tag was finished using the Scallop Tag Topper, new in this years Annual Catalog. Then layering Birthday Bash DSP and some Washi tape (not sure what catalog the tape was from but it is the green with arrows) on Hello Honey, Black and Old Olive card stock . On the inside we stamped the cute sentiment of adding a little ice cream….I like ice cream with my cake, do you?


Still using the Big Day stamp set and this time we used a couple new products; Chalkboard Paper and ColorBox Chalk Ink. “Chalkboard” is so in right now and this is a fun way to use it. We stamped the celebrate your day image with the Yellow chalk ink on the chalkboard paper. To give it a bit more texture, we used clear embossing powder over the top.  The ribbon at the top is Hello Honey Stitched Satin ribbon (I love the feel of this ribbon; it reminds me of the top of a baby’s blanket). The banners behind the chalkboard paper were cut from the Moonlight Designer Series Paper Stacks – would that be DSPS? – I like these 4-1/2 x 6-1/2 papers stacks, they give you a good selection of the same color palate while allowing the you to choice whatever papers strikes your fancy. I love to see everyone’s choices once they add them to their cards. The hearts stamped in the background was from an old set (don’t even know the name) I just liked the added color and I guess I <3 (heart) cake! Inside again used some Washi tape and stamped the cake on a platter in Hello Honey. 


Okay, back to our projects and moving away from cake. This next stamp set is sooooo fun. With the popularity of everyone giving gift cards now, SU really out did themselves. The B.Y.O.P (Buy Your Own Present) has sayings that are suited for birthdays, graduation, thanking someone, baby, wedding and a general one for any occasion. 
I took my creativeness from Chris Slogar’s file card sample and then used the Birthday Bash DSP for my color inspiration. If you look closely you can see some gold confetti flakes in this paper. To highlight the gold flakes, I use our Gold Sequin Trim ribbon and for more fun added the new Pom Pom Trim. I created a tag for the B.Y.O.P. stamp and used the Scallop Tag Topper again for the tag, then colored in the letters. On the inside I created a pocket to place your gift card in, with the stamped image explaining that they get to buy their own present. Are you wondering how we created this file card? Well, by using the SU envelope punch board, yes you can make your own envelopes as well as these fun file cards. 


Finally, next month is February, I had to do one Valentine’s Day card. My trick was to prepare a card without purchasing any new stamps. It is not that I don’t like any of the new stamps; I just knew I won’t reuse them later on. So, I pulled out my Label Card Thinlet set and it has the I (heart) u cut out, perfect.  But that wasn’t enough; I started looking around and grabbed the Chevron punch, the Heart from the Itty Bitty Accents Punch Pack and the new What’s Up punch. While I was looking around, I found the Be Mine stamp in the A Round Array set that was just enough to bring this all together. I think it worked. 


More about the FREE Big Day stamp set and SAB. Once a year when the new Occasion mini catalog comes out SU likes to reward their customers with FREE products. How do you get these items, for every $50 you spend, and that can be from the annual or mini catalog. The SAB products available to you are stamp sets, ribbon and button accessory packs, DSP, Project Life products, and added this year are Blendabilities Markers, the selection is wonderful. 

Please contact me, if you want to know more about these FREE items or any other products discussed in this blog or to come to one of my Saturday classes.
Dates for my classes are:
March 14th – Theme: Blooming
May 16th
July 18th
September 12th
November 21st


Thank you for stopping by and I hope you have some wonderful Celebrations this month too!


Thursday, January 1, 2015

Welcome 2015

Wow, what a year this has been; many lows, but many highs (I choose to remember the highs!) one my highs has been stamping with my crafty friends this past year, you have given me strength and encouragement throughout the year – thank you.

With that said, I will be bidding ado to my Mojo Monday’s in 2015. I believe it course has run its self out. This doesn’t mean I am giving up stamping or Stampin’ Up – I am just charting a new course and will be holding my classes now on Saturdays, at my home in Lincoln and every other month.

The new “group” will be a bit more of a social gathering of crafty women (men are invited too). We will start at 10:30 am, we will do at least 4 projects maybe more or the opportunity to make duplicates of the cards, and the cost will be $20, remember that includes all the materials (except your adhesive). Of course the cards will feature the most current SU products and I have the new Occasion and Sale-a-Bration catalogs.

For now my tentative schedule is:
January 24th – Confirmed
March 21st
May 16th
July 18th
September 19th
November 21st

Our first class will be based on new SU product from the Occasions and SAB Catalog and will be about Birthdays and Celebrations. For March, I have planned a “Blooming” theme – yep flowers – I know different for me, but love the new stamp sets. I have some ideas for a Travel theme in the future, I just haven't gone that far out yet. 


I know this change won’t work out for some of you and that is okay, I am sure our crafty paths will still cross. Being that the class will be every other month I am hoping you will be able to make it now and then.  Plus, I am hoping Janice and I will still do our annual Handmade Holiday event – more to come on that later this year.

So this is my new start to the New Year and with a new schedule, and I am sure you noticed the new look to my blog page. I am excited about 2015 I hope you are too. Thanks for stopping by and I hope you can make it to my new "group" for stamping. 

Monday, August 18, 2014

August - Big Shot


Yes, this month’s Stampin’ Up! (SU) special is the Big Shot. With the purchase of a new Big Shot you received a FREE stamp set and Framelit bundle. If you already have a Big Shot you could purchase the bundle at a 15% savings. I decided to purchase my second Big Shot – yes, I now have 2. What surprised me the most when I unpacked my new Big Shot was the new clear plates (new to me). They are beveled on the leading edges. So, when you run them through they should glide a bit smoother than before. As you will see, I am using my new Big Shot in all of the following pictures.
Starting with my first two cards, I used the Tea Party stamp set. This stamp set was requested to be used by Pam and it was fun to play with, thank you Janice for allowing me to borrow it from you.
For the first card, I CASE my card from Kerry (Kez) Bunting all the way from Australia, thank you Kez. I wanted to go a little more romantic than my case sample, but I felt that this year’s DSP doesn’t really have the feel I was looking for. So, I used some retired DSP and then incorporated current elements into the card. I was pleased with the end result.  


The second card, using the Tea Party stamp set, does use current DSP Park Lane. I like the combo of the Old Olive and Calypso Coral. If you look closely you will see the coral dots in the DSP. The hint of it is peeking out above the stamped boarder and also in the layered wording of TEA PARTY. I like this color combo especially against the crisp, white background and might use it again.
 Speaking of crisp, white background…..I love the simple and bold color combo of Pumpkin Pie and white used with the ever so cute Kind Koala single stamp. I layered the pumpkin pie card stock on top of white by cutting out two Banners Framelits and then stamped in Black StazOn the simple and adorable Koala image. To further enhance the color combo, I colored in the flower with a Pumpkin Pie marker and added Pumpkin Pie Chevron ribbon underneath the banners. Adorning the flower is a jumbo rhinestone and a touch of pink was added to the inner ears of the Koala. Too Cute. 
 
 
Lastly, and another CASE card from Dena Rekow, is a fun RomCom card. What you say is a RomCom….maybe my own term, but I think this card has a romantic (Rom) but Comedic (Com) feel to it, RomCom. It uses another single stamp Friends Who Know and the Chalk Lines stamp set. I liked all the layers and colors used on this card and it was fun to do.

All of these cards had a common theme for them. Each one used the Big Shot and Framelits which brings me back to the August – Big Shot special. If you would like to purchase your own Big Shot and receive FREE products please contact me and I would be happy to assist you in your purchase, or click the flower vines in the righthand column to place your order. But, hurry this promotion ends at the end of the month!
Thanks for stopping by.


Sunday, July 20, 2014

More Mojo Monday's......


I know I have said this before, but my life has been turned upside down a lot in the past 10 months. So much has happened (and believe me a lot has), that was not good and very time consuming, but that can be for another blog post.

For this post, I am going to share with you my past Mojo Monday cards starting with June’s projects.

The first two cards, we used the new Work of Art stamp set, [page 165 of the Annual Catalog (AC)]. This new set is really fun to create different cards. You have to step out of your comfort zone and look at the shapes and swatches differently (there are some really beautiful ideas posted). Because we were using this set in June, I wanted to do one card with the 4th of July in mind. Using the different shapes, we created a flag image – cute huh!

For the second card, I used some of the new 2014-2016 In-Colors with my favorite being the Blackberry Bliss. I think I have shared with you before my new love for purple. For this card, you inked up one of the swatches and then just stamped it three times, each time moving the stamp a little lower. With each time you stamped it the ink would get lighter and lighter and even looks like you used a different color each time. I accented the card with a little of the Hello Honey (another new in-color) ribbon and stamped heart.  By the way, this new in-color ribbon is so soft and beautiful.


For our next card, I use a single stamp Look up to Father, from the Occasional Mini. The card shown here uses another sentiment under the tree, because I forgot to take a picture of the card with the Father sentiment on it before I gave it to my dad.  This stamp didn’t make it into the new Annual Catalog, but I think I might use the tree again.


The last card shown here, we didn’t complete at Mojo, but I wanted to share with everyone the new Blendabilities markers. Of course, the color that drew me in to the Blendabilities was the Blackberry Bliss; with the purchase of the Blendabilities you receive 3 markers in different shades. I am going to have to play a little bit more with these. Remember, you must use the Memento pad and ink or you will have big issues and no one wants issues, hehehe. Check all the colors and supplies on page 212 of the Annual Catalog.  
July’s Mojo Monday cards –
I had a request to use the new Something for Baby set and matching Framelits, (page 74 AC); remember to save $$ and purchase the bundle. When I started to work on these cards, I couldn’t decide between a little girl or a little boy card so I did both. Starting with the little girl card, I wanted to add layer of dimension. So, I used the new Decorative masks (page 205 AC) by using the Heart mask and sponging it. I love how the pattern is more concentrated at the bottom versus the top. For the tag, I used the new Scalloped Tag Topper punch and sponged around the edges.
The boy’s version, I saw a card similar to this one but it used an older stamp set. I just used a couple more current items to create this card. Again, stamping and punching out the onesies and socks (remember when your babies ran around in their socks, now they are just found on their bedroom floor). Then for adding a little bit more texture, I used the Electric Paper Piercing pack and outlined the onesies. The grass was made using the new Fringe Scissors (page 215 AC). They are so easy to use and what a time saver if you have been cutting grass by hand one “blade” at a time (think about using these scissors for Easter scrapbook pages). The clothes line is Bakers Twine and the mini clothespins are a previous SU retired product.
I think both cards are so darn cute for the new little one(s) in your life.
 

Well, just as I couldn’t decide on creating a girl or boy baby card, I could decide on to create a dog or cat card. So, I did both again. The set we used to create these cards is Cool Kid, again this set was in the Occasional mini catalog and they are retired, but because of my crazy life the past months, I had purchased this fun set but didn’t a chance to use it before the catalog expired, (Life). I do have to give a shout out to Dawn Olchefske, for these cards that I CASE them from, thank you Dawn.


Okay, maybe I was coming out of my shell, because I thought what the heck let’s do one more card. I wanted to do one a little more romantic, girlie or at least flowery. I saw a similar version of this card, but they used the Stippled Blossom set and I didn’t have it. So, I used the Flowering Flourishes (page 118 AC) for the background and the Chalk Talk (page 11 AC), for the “tag” sentiment; remember to purchase the bundle, set and Framelits for savings. The small flower are the Petite Petals set (page 125 AC) and then punched out using the Petite Petals Punch (page 219 AC). I then used some retired brads that are flowers and some with designs on them. I think they gave a fun whimsical touch to them. I have to admit this card was a stretch for me; because I don’t do usually do flowers, but even this old cat can learn new tricks.  

Thank you for stopping by and if you need a catalog or wish to order anything that have seen here, please let me know.
 

Sunday, March 23, 2014

What is up with 2014?????

I have been struggling this year with my personal and stamping domain. I think my stamping or lack of stamping is because of the trials I am going through in my personal life.

This years started out horrible. In January, I found out my estranged mother has breast cancer. We are still working through our relationship and her cancer, which has taken a turn for the worse and I am dealing with helping with her medical treatments and healing. Then came the death of my step mother-in-law in February and this month March, was my own surgery on my shoulder. So stamping and blogging has not been my priority and I am off my mojo a bit.

I have been blessed with friends and family support and know I couldn't have gotten through these couple of months without them. So, for those of you (and you know who you are) Thank You!

To try and catch up with the past couple of months of my Mojo Monday group I am just going to post the pictures of the cards we completed. So, here goes and I hope I have these listed correctly, hehehe.

January:


February:


March: These cards were done using the Sale-a-Bration stamp sets and paper. You still can get FREE stamps until March 31st.


 Thanks for Stopping by and I think I will use the saying on this card for my inspiration.

Sunday, October 27, 2013

Handmade Holiday


Janice and I teamed up together this year to hold a Handmade Holiday workshop based upon the new Stampin’ Up Holiday Catalog. I focused my projects towards Halloween and Thanksgiving and Janice prepared Christmas. It was a fun filled, paper crafters delightful afternoon. Let me show you some of the projects we completed.

Starting with the Boo Banner:


My inspiration for this banner was from the Halloween Banner Kit (pg. 4-5 of the holiday catty). Although the Build a Banner Simply Created Kit includes 18 - 5” x 7” canvas pennants, my pennants were made of paper. Also included in the banner kit are 26 alphabet and 3 image stencils, 9’ of jute twine and 2 Stampin’ Spritzers.

We started out by stenciling the backgrounds; stripes, dots, and chevrons with Pumpkin Pie and Crushed Curry on the pennant pieces and then the b-o-o letters in black.

Additionally, items to embellish the pennants were; Toil & Trouble, Halloween Bash, Tags 4 You stamp sets, Witches’ Brew Designer Series Paper, the Label Bracket, Oval and Scallop Oval punches, and the Apothecary Framelits. (Oh, and the retired bat punch – sorry, I still like that guy for Halloween projects).   

So far I have created three banners from the Build a Banner kit and have found this to be a fun and versatile kit from holidays to birthdays!


Bats about you card   

After completing the banner, another Halloween inspired project was the Bats about you card. Staying with the Pumpkin Pie, Crushed Curry, and Black color scheme, this card uses the Halloween Hello stamp set for its images.


I think the bat looks like it is flying off to look for ____ (fill in with your own idea – candy, blood, etc.) by stamping the image 3 times without re-inking.
 
 
Are you wondering what punch was used for the BATS ABOUT YOU image? Clever trick ~ I learned from my crafty friend Wanda. First, stamp your image. Then, punch out the image aligning it close to one side or the other for your first punch, (I used the new Artisan Label punch). Then, adhere a strip of scrap paper to your punched out image (making a handle). Insert that piece back into the punch and line up to the other side of the stamped image – punch. So, now you have a smaller version of the original punch.  Note: you can do this with other punches to achieve a variety of custom ‘punches’.  

Tag a Bag – eat IF YOU DARE!

For my final Halloween project, I changed up the color scheme to Black, Real Red, and Silver Glitter. Again using the Halloween Bash stamp set to achieve the 3 colors for the stamp image, we used the Stampin’ Markers and inked the words individually. This is an easy technique to do if you want a more customized image.
The image was then cut out by hand and adhered to a pre-cut (Label framelit) out of the Silver Glitter Stock. I like adding a bit of bling to Halloween (ha, ha that rhymes). The 2 strips behind the glitter stock are Witches’ Brew Washi Tape and black card stock cut to size. For the red Rhinestones I just colored them with a red Sharpie pen. Note: you can do this with other Sharpie colors, too.
After layering all the label pieces together, it was simply tying a bit of the Black and Silver taffeta ribbon around the Chevron Tag-a-bag and adhere the label over the knot. Janice prepared a special treat of Sugar Cookies that you could put inside your bag if you wanted to, but I saw a lot of empty bags – hehehe, they were tasty.

Thankful Candy-bar Wrapper

Moving on to Thanksgiving, we did a simple candy bar wrapper. Using the new Thinlet Expressions “thankful” die, it was just a matter of layering it on the new Cotton Ribbon, adding a die-cut acorn, a button, and a small “thankful for you” banner from the Hostess Banner Greeting stamp set.
I really like the new expressions thinlets. They come in three sayings; thankful, merry, and love. I will be using the “merry” words in November for a Christmas card – keep your eye out for that post.

Truly Grateful card

My last, but not least project was a Thanksgiving card. This card used another new SU product called the Label Thinlets Card Die. This card die comes in 2 versions label and circle. I like to call these “swing-cards” because the cut out label kind of swings back and forth when you open it up. The stamp set used for this card is Truly Grateful. The embellishments used were Washi tape, Jumbo Pearls, and the Birch Paper from the Thankful Tablescape Simply Created Kit. The picture of this paper in the catalog does not do it justice. It is something that you need to see and touch to truly appreciate it. I would think that SU would do wisely if they offered it as a stand-alone product as a specialty DSP. 
Here are some of the crafty ladies who participated in the event:


Thanks for stopping by - Happy Halloween!