Sunday, July 20, 2014

More Mojo Monday's......


I know I have said this before, but my life has been turned upside down a lot in the past 10 months. So much has happened (and believe me a lot has), that was not good and very time consuming, but that can be for another blog post.

For this post, I am going to share with you my past Mojo Monday cards starting with June’s projects.

The first two cards, we used the new Work of Art stamp set, [page 165 of the Annual Catalog (AC)]. This new set is really fun to create different cards. You have to step out of your comfort zone and look at the shapes and swatches differently (there are some really beautiful ideas posted). Because we were using this set in June, I wanted to do one card with the 4th of July in mind. Using the different shapes, we created a flag image – cute huh!

For the second card, I used some of the new 2014-2016 In-Colors with my favorite being the Blackberry Bliss. I think I have shared with you before my new love for purple. For this card, you inked up one of the swatches and then just stamped it three times, each time moving the stamp a little lower. With each time you stamped it the ink would get lighter and lighter and even looks like you used a different color each time. I accented the card with a little of the Hello Honey (another new in-color) ribbon and stamped heart.  By the way, this new in-color ribbon is so soft and beautiful.


For our next card, I use a single stamp Look up to Father, from the Occasional Mini. The card shown here uses another sentiment under the tree, because I forgot to take a picture of the card with the Father sentiment on it before I gave it to my dad.  This stamp didn’t make it into the new Annual Catalog, but I think I might use the tree again.


The last card shown here, we didn’t complete at Mojo, but I wanted to share with everyone the new Blendabilities markers. Of course, the color that drew me in to the Blendabilities was the Blackberry Bliss; with the purchase of the Blendabilities you receive 3 markers in different shades. I am going to have to play a little bit more with these. Remember, you must use the Memento pad and ink or you will have big issues and no one wants issues, hehehe. Check all the colors and supplies on page 212 of the Annual Catalog.  
July’s Mojo Monday cards –
I had a request to use the new Something for Baby set and matching Framelits, (page 74 AC); remember to save $$ and purchase the bundle. When I started to work on these cards, I couldn’t decide between a little girl or a little boy card so I did both. Starting with the little girl card, I wanted to add layer of dimension. So, I used the new Decorative masks (page 205 AC) by using the Heart mask and sponging it. I love how the pattern is more concentrated at the bottom versus the top. For the tag, I used the new Scalloped Tag Topper punch and sponged around the edges.
The boy’s version, I saw a card similar to this one but it used an older stamp set. I just used a couple more current items to create this card. Again, stamping and punching out the onesies and socks (remember when your babies ran around in their socks, now they are just found on their bedroom floor). Then for adding a little bit more texture, I used the Electric Paper Piercing pack and outlined the onesies. The grass was made using the new Fringe Scissors (page 215 AC). They are so easy to use and what a time saver if you have been cutting grass by hand one “blade” at a time (think about using these scissors for Easter scrapbook pages). The clothes line is Bakers Twine and the mini clothespins are a previous SU retired product.
I think both cards are so darn cute for the new little one(s) in your life.
 

Well, just as I couldn’t decide on creating a girl or boy baby card, I could decide on to create a dog or cat card. So, I did both again. The set we used to create these cards is Cool Kid, again this set was in the Occasional mini catalog and they are retired, but because of my crazy life the past months, I had purchased this fun set but didn’t a chance to use it before the catalog expired, (Life). I do have to give a shout out to Dawn Olchefske, for these cards that I CASE them from, thank you Dawn.


Okay, maybe I was coming out of my shell, because I thought what the heck let’s do one more card. I wanted to do one a little more romantic, girlie or at least flowery. I saw a similar version of this card, but they used the Stippled Blossom set and I didn’t have it. So, I used the Flowering Flourishes (page 118 AC) for the background and the Chalk Talk (page 11 AC), for the “tag” sentiment; remember to purchase the bundle, set and Framelits for savings. The small flower are the Petite Petals set (page 125 AC) and then punched out using the Petite Petals Punch (page 219 AC). I then used some retired brads that are flowers and some with designs on them. I think they gave a fun whimsical touch to them. I have to admit this card was a stretch for me; because I don’t do usually do flowers, but even this old cat can learn new tricks.  

Thank you for stopping by and if you need a catalog or wish to order anything that have seen here, please let me know.
 

Sunday, March 23, 2014

What is up with 2014?????

I have been struggling this year with my personal and stamping domain. I think my stamping or lack of stamping is because of the trials I am going through in my personal life.

This years started out horrible. In January, I found out my estranged mother has breast cancer. We are still working through our relationship and her cancer, which has taken a turn for the worse and I am dealing with helping with her medical treatments and healing. Then came the death of my step mother-in-law in February and this month March, was my own surgery on my shoulder. So stamping and blogging has not been my priority and I am off my mojo a bit.

I have been blessed with friends and family support and know I couldn't have gotten through these couple of months without them. So, for those of you (and you know who you are) Thank You!

To try and catch up with the past couple of months of my Mojo Monday group I am just going to post the pictures of the cards we completed. So, here goes and I hope I have these listed correctly, hehehe.

January:


February:


March: These cards were done using the Sale-a-Bration stamp sets and paper. You still can get FREE stamps until March 31st.


 Thanks for Stopping by and I think I will use the saying on this card for my inspiration.

Sunday, October 27, 2013

Handmade Holiday


Janice and I teamed up together this year to hold a Handmade Holiday workshop based upon the new Stampin’ Up Holiday Catalog. I focused my projects towards Halloween and Thanksgiving and Janice prepared Christmas. It was a fun filled, paper crafters delightful afternoon. Let me show you some of the projects we completed.

Starting with the Boo Banner:


My inspiration for this banner was from the Halloween Banner Kit (pg. 4-5 of the holiday catty). Although the Build a Banner Simply Created Kit includes 18 - 5” x 7” canvas pennants, my pennants were made of paper. Also included in the banner kit are 26 alphabet and 3 image stencils, 9’ of jute twine and 2 Stampin’ Spritzers.

We started out by stenciling the backgrounds; stripes, dots, and chevrons with Pumpkin Pie and Crushed Curry on the pennant pieces and then the b-o-o letters in black.

Additionally, items to embellish the pennants were; Toil & Trouble, Halloween Bash, Tags 4 You stamp sets, Witches’ Brew Designer Series Paper, the Label Bracket, Oval and Scallop Oval punches, and the Apothecary Framelits. (Oh, and the retired bat punch – sorry, I still like that guy for Halloween projects).   

So far I have created three banners from the Build a Banner kit and have found this to be a fun and versatile kit from holidays to birthdays!


Bats about you card   

After completing the banner, another Halloween inspired project was the Bats about you card. Staying with the Pumpkin Pie, Crushed Curry, and Black color scheme, this card uses the Halloween Hello stamp set for its images.


I think the bat looks like it is flying off to look for ____ (fill in with your own idea – candy, blood, etc.) by stamping the image 3 times without re-inking.
 
 
Are you wondering what punch was used for the BATS ABOUT YOU image? Clever trick ~ I learned from my crafty friend Wanda. First, stamp your image. Then, punch out the image aligning it close to one side or the other for your first punch, (I used the new Artisan Label punch). Then, adhere a strip of scrap paper to your punched out image (making a handle). Insert that piece back into the punch and line up to the other side of the stamped image – punch. So, now you have a smaller version of the original punch.  Note: you can do this with other punches to achieve a variety of custom ‘punches’.  

Tag a Bag – eat IF YOU DARE!

For my final Halloween project, I changed up the color scheme to Black, Real Red, and Silver Glitter. Again using the Halloween Bash stamp set to achieve the 3 colors for the stamp image, we used the Stampin’ Markers and inked the words individually. This is an easy technique to do if you want a more customized image.
The image was then cut out by hand and adhered to a pre-cut (Label framelit) out of the Silver Glitter Stock. I like adding a bit of bling to Halloween (ha, ha that rhymes). The 2 strips behind the glitter stock are Witches’ Brew Washi Tape and black card stock cut to size. For the red Rhinestones I just colored them with a red Sharpie pen. Note: you can do this with other Sharpie colors, too.
After layering all the label pieces together, it was simply tying a bit of the Black and Silver taffeta ribbon around the Chevron Tag-a-bag and adhere the label over the knot. Janice prepared a special treat of Sugar Cookies that you could put inside your bag if you wanted to, but I saw a lot of empty bags – hehehe, they were tasty.

Thankful Candy-bar Wrapper

Moving on to Thanksgiving, we did a simple candy bar wrapper. Using the new Thinlet Expressions “thankful” die, it was just a matter of layering it on the new Cotton Ribbon, adding a die-cut acorn, a button, and a small “thankful for you” banner from the Hostess Banner Greeting stamp set.
I really like the new expressions thinlets. They come in three sayings; thankful, merry, and love. I will be using the “merry” words in November for a Christmas card – keep your eye out for that post.

Truly Grateful card

My last, but not least project was a Thanksgiving card. This card used another new SU product called the Label Thinlets Card Die. This card die comes in 2 versions label and circle. I like to call these “swing-cards” because the cut out label kind of swings back and forth when you open it up. The stamp set used for this card is Truly Grateful. The embellishments used were Washi tape, Jumbo Pearls, and the Birch Paper from the Thankful Tablescape Simply Created Kit. The picture of this paper in the catalog does not do it justice. It is something that you need to see and touch to truly appreciate it. I would think that SU would do wisely if they offered it as a stand-alone product as a specialty DSP. 
Here are some of the crafty ladies who participated in the event:


Thanks for stopping by - Happy Halloween! 


Thursday, October 24, 2013

Back and Blogging!

I’m back and I'm blogging!

I am so sorry that I have not posted the past couple of months projects. I had some personal issues to contend to and then just got super busy plus a little bit of R&R to round things off. So, you will see a few blog posting back to back to catch up and here is the first one…….


Yippee-Skippee!


First off, isn’t it fun to say Yippee-Skippee? I could just say it over and over, Yippee-Skippee! No, really you should try it – it will put you in a great mood. Go ahead, say it now and you will see what I mean.


Back to the cards, I semi-cased this cards design from Anne who is in my Saturday Scrapper group. I loved how the inner piece reveals the “hidden” sentiment. Her card had more flowers on it, but the idea was still the same. Thanks Anne.

If I was making this card for one of my boys, I would have to stamp the inside sentiment three (3) times so it would read: You can never have too much happy, happy, happy!

Yes, we are big time Duck Dynasty fans in our house.   


Here is another fun card, again using the Yippee-Skippee set and adding the cake and Happy Birthday banner from the Sketched Birthday stamp set.


For both cards I used the same color scheme of Crisp Cantaloupe and Strawberry Slush, and DSP - Birthday Basics. In addition the Ruffle Stretch Trim ribbon around the DSP is Pistachio Pudding. This ribbon is so fun to use, it comes already pleated (time saver!).
 

Hello Halloween!

I guess I should say Halloween Hello, because that is the actual name of the stamp set used for the next two cards. This first card was so fun. I loved using the clean crisp colors of Halloween; Pumpkin Pie, Black and White, matched with the simple one image per square, layered on the black and orange. I then added the Halloween Washi tapes and stamped the background with the Gorgeous Grunge stamp set. I think it gives it a kooky twist.

Between you and me I had never used the Washi tape before and everyone just raved about it. Had no idea how fun it is to use and add a bit of flare to your paper crafting.

Oh, I have to give a shout out to Carrie King for this card, because I cased it.


It is all about the candy!

And that is what I was going for on this card. But I will admit, I think my creativity fell a little short on this card. It happens. I won’t go into detail about this card, but I continued to use the Halloween Hello stamp set.
Okay, you may have picked up on a trend with these cards. Yes, we are completing two (2) cards per stamp sets for a total of four (4) cards at my Mojo Monday’s group. This will give you a couple different ideas to use per stamp set. After that sky’s the limit for your own creative masterpieces….pieces are we talking about candy again, because it is all about the candy in October!

Thanks for stopping by and Happy Haunting Stamping!


Saturday, June 29, 2013

June's Mojo Monday Cards


Wow, June has been a very busy month for me both personally and Stampin’. I helped out my up-line manager Janice with her two groups and then had my own Mojo Monday group this month, too. With everything that was going on, we did cancel Saturday Scrappers. That was a bit of a break, even though I missed seeing the ladies in the group.
For my Mojo group, we did 3 projects; 2 cards and 1 note card.

Starting with the note cards, I saw this idea from another SU demonstrator Becky Roberts quite some time ago and finally decided to make them. This was an opportunity to use one of my favorite, but newly retired, DSP Twitterpated stock, plus I now have both butterfly punches. For the base stock, I again used up retired card stock. For my sample, I used Pretty-in-Pink, but I gave the others a choice of this and/or Baja Breeze and Lucky Limeade. I layered with Vanilla where I punched out the large butterfly. Under the butterfly is the DSP “peeking out” from underneath.  On top is more DSP that gave a more delicate edge using the Scalloped Trim Border punch. On the small butterfly, I added a couple of Rhinestones to give a little more bling.

My next card project was themed for July 4th. I had received this card idea from a swap at last year’s SU Convention from Billi Parus and then modified it for my group.

For the stripped portion of the flag, I started with Vanilla card stock and used the Stripped Embossing Folder. Yes, I know there are more stripes on this flag than a real one – Artistic License was invoked here.  The red stripes are small strips of Real Red. I cut them out for everyone, but with the new SU trimmer it was very simple (Let me know if you would like a new trimmer, too. I can order one for you.) Next, I used Night of Navy card stock for the blue edge and USA letters. The letters were cut out using the Big Shot and the Typeset Alphabet dies. I have to admit the small star at the top is an old retired set. I am not even sure of its name. I think it was from 2008, but I liked how it has happy written into one of the stars points. I liked this card and how being in the USA makes me happy.

Happy early Birthday USA!
 
The last card is one that I had designed all by myself. See my idea mock-up below.
I had thought about using the Polka Dot Parade DSP originally, but when I sat down and started cutting out stock to bring my idea from paper to fruition the bling in me came out. So, I used our Silver Glimmer paper instead. I like my change, do you? The two stamp sets I used are returning sets from the Spring Mini Catalog; Just Married for the Cake and Mr. & Mrs. for the same name.
Additionally, I used just Basic Black and White card stock and Black Staz-on ink. To achieve the perfectly cut oval, I used three layers dies from the Oval Collection. You can see that I was able to cut all three layers at one time, a real time saver.  I like how the silver glimmer paper with the black and white produced an elegant, clean card.
 
Thanks for stopping by. See you next month.

Friday, May 31, 2013

Inspire, Create, Share

 
The new Catty is here, The new Catty is here!
 
Click on the link on the right hand side and take some time to review the new beautiful catalog. If you are attending my next Mojo Monday or Saturday Scrappers you will be treated to one of your own. See you then.  


Tuesday, May 28, 2013

May Projects.....Good bye colors...

Wow, after looking at the photos of my projects I realized that it is all about the men in my life (except the purse).

I wanted to use retiring colors and papers for this month’s projects. I also knew what themes I wanted to showcase; Graduation, and Father’s Day along with using the Purse Die for both the Mother’s and Father’s Day theme.
 

Starting with the graduation card.

My youngest Conner, will be graduating from 8th grade this year. As it turns out his school colors are Burgundy, Black and White so I used the retiring Bravo Burgundy in this card. In addition to the black and white card stock, I added a bit of bling with the Silver Glitter Paper to accent behind the stamped graduation hat. The hat stamp and sentiment can be found in the Pure Gumption set, from the Spring Mini Catty.* Also used for this card is the Houndstooth Embossing Folder ~ ha, I thought this folder was new, but upon further research it is just new to me.
 

Next is the Father’s Day card.

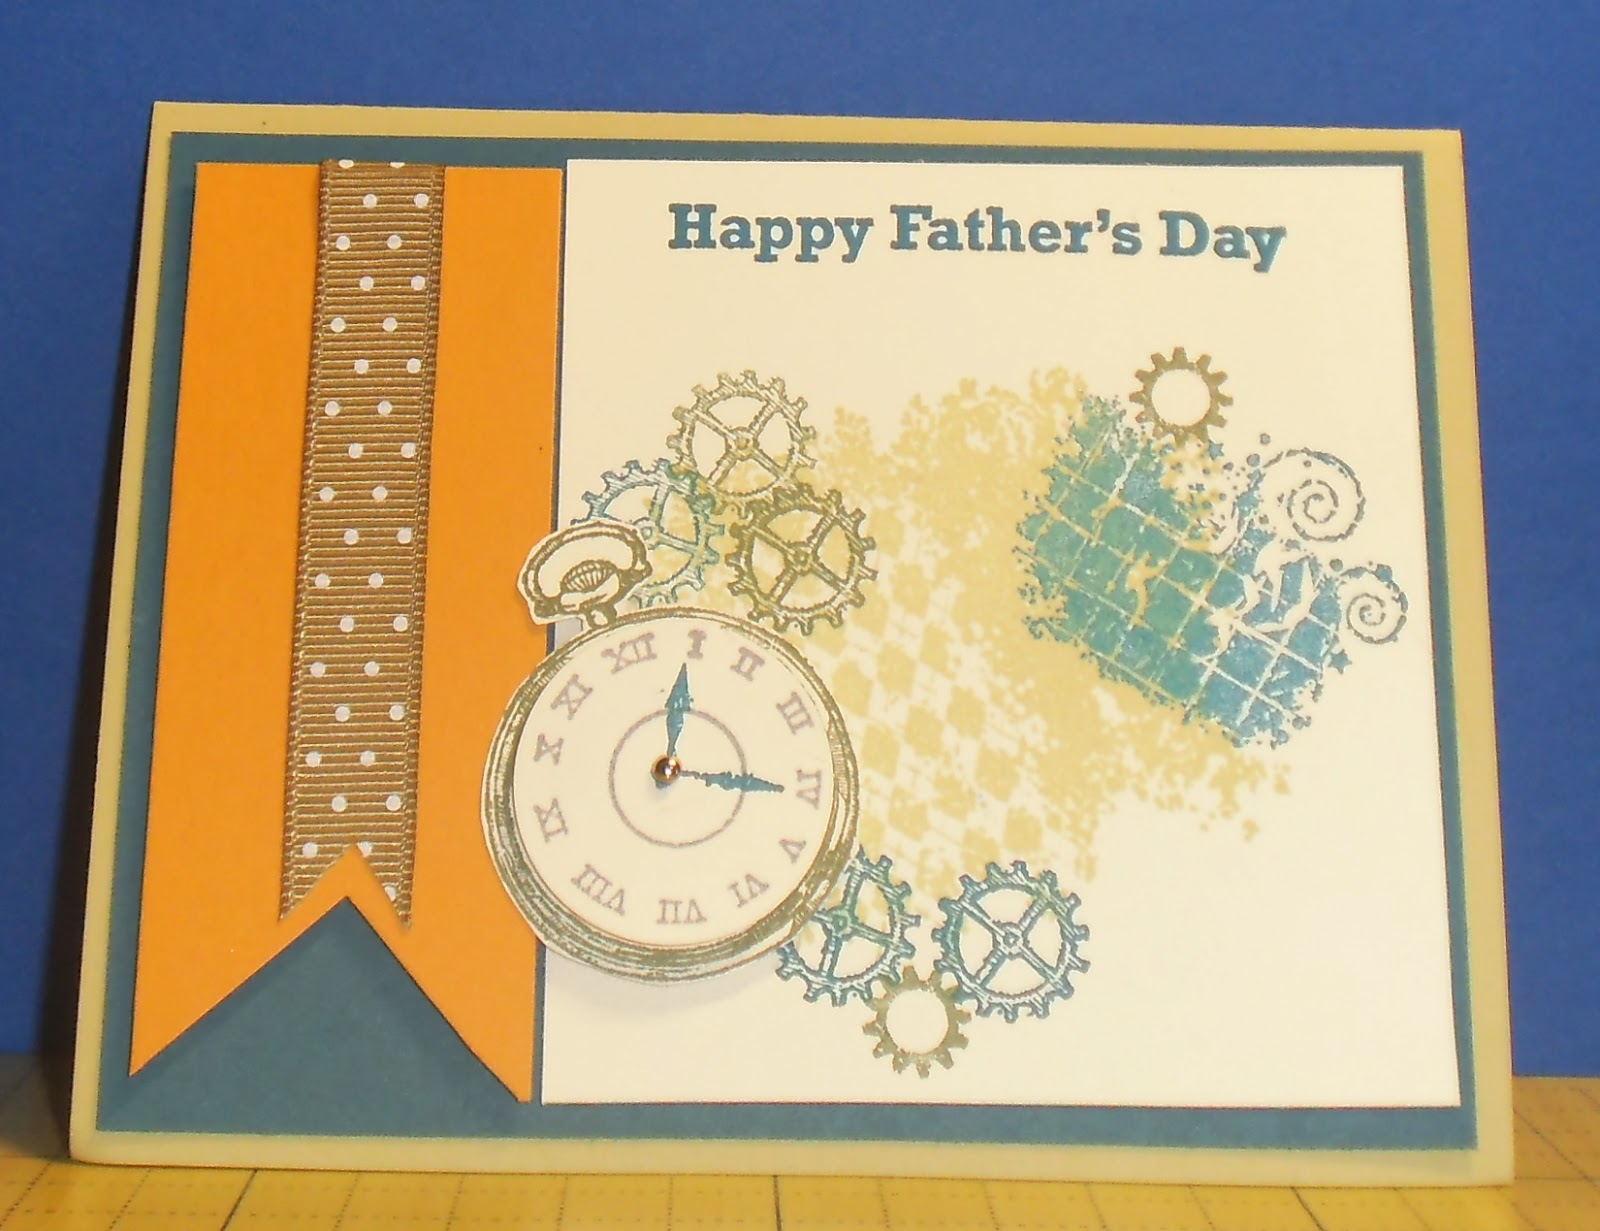
This card uses the Clockworks* set (again, thought this was a new item but only new to me…). Of course the men in my life for this card are my father and husband. The main colors used for this card are all retired; Night of Navy, River Rock, and More Mustard. The latter two are two of my favorite colors that I will be sad to see go. In addition, I threw in some really old retired ribbon to add another layer of dimension.


Lastly, we did a 3-D project using the Big Shot Petite Purse Die.

I’ve had this die for a while, but for some reason never used it at my groups. For the ladies purse version, just in time for Mother’s Day, I used retiring DSP and corresponding ribbon. For the Father’s Day fishing creel, I used Crumb Cake card stock for the body. I then embossed it using the Square Lattice Folder, to give it a look of woveness (new word ??). The corners and handle are Chocolate Chip stock and then one of our Metallic Brads to look like a clasp. The fishing pole is a wooden skewer cut down to size and the line is Early Espresso Baker’s Twine from the Holiday Mini Catty. So, are you wondering what set the fish are from? It is C for Cat. Yes, this is an old-old set, but I couldn’t part with it, nor the D is for Dog set, hehehe.

Thanks for stopping by, see ya next month.

*Spoiler alert – these sets will be carried over to the Annual Catalog